The Enduring Allure of Perfectly Roasted Pumpkin Seeds: A Timeless Autumn Snack Simplified
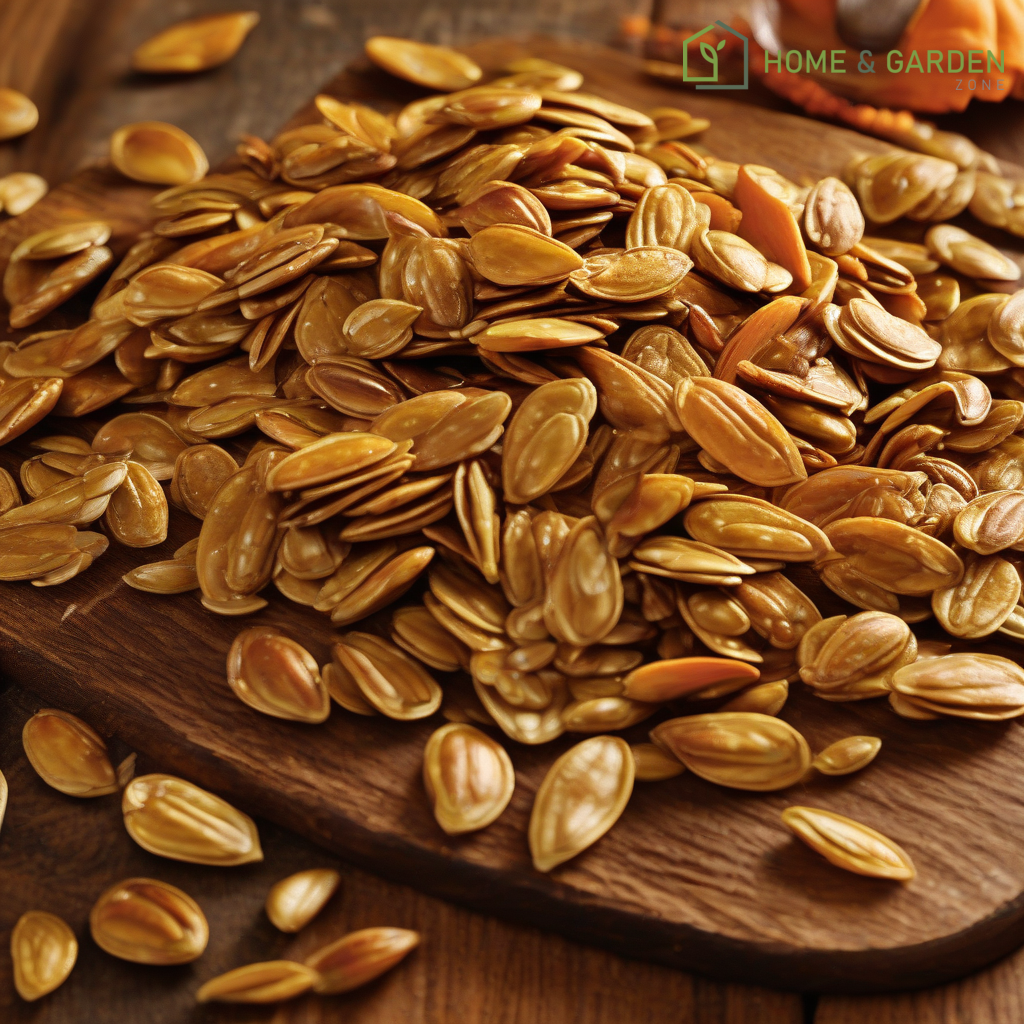
The ritual of carving pumpkins for autumn festivities often yields a hidden culinary treasure: their seeds. For many, including this author, the tradition of transforming these humble seeds into a crispy, savory snack stretches back to childhood, a simple act passed down through generations. While the process is remarkably straightforward, its very simplicity has often led to the notion that it's "not really a recipe"—a sentiment I've long shared. Yet, the persistent requests for "my" method underscore a universal desire for guidance, even on the most uncomplicated of culinary endeavors. This article aims to demystify the art of roasting pumpkin seeds, offering a clear, authoritative guide to achieving consistently delicious results.
The Uncomplicated Art of Roasting Pumpkin Seeds
At its core, roasting pumpkin seeds is about transforming a fibrous, moist seed into a crunchy, flavorful bite. The magic lies in a few critical steps that, when executed correctly, elevate a byproduct into a star snack. It’s less about intricate techniques and more about precise preparation and attentive execution.
Essential Preparation: From Gourd to Good
Step 1: Cleaning and Separation
Upon extracting the seeds from the pumpkin, they will be encased in stringy pulp. The most effective method for separation involves placing the seeds and pulp in a large bowl of water. The seeds tend to sink, or at least separate more easily, while the pulp can be gently pulled away. Rinse the seeds thoroughly under cold running water, removing all remaining pumpkin flesh and fibers. This step is crucial for achieving clean, evenly roasted seeds.
Step 2: The Critical Dry
Perhaps the most overlooked, yet vital, step is drying the seeds. Excess moisture will steam the seeds rather than roast them, resulting in a chewy, rather than crispy, texture. After rinsing, spread the seeds in a single layer on a clean kitchen towel or paper towels. Pat them thoroughly dry. For optimal crispness, some culinary experts recommend allowing them to air dry for several hours, or even overnight, after initial towel drying. This ensures minimal surface moisture.
Seasoning – The Flavor Canvas
Once clean and dry, the seeds are ready for seasoning. The classic approach is elegantly simple: a touch of fat and a sprinkle of salt. Olive oil or melted butter are excellent choices, providing a medium for even heat distribution and adherence for seasonings. Approximately one tablespoon of oil per cup of seeds is a good starting point. Toss the seeds with the chosen fat until lightly coated. Then, season generously with sea salt or kosher salt. Beyond this foundational approach, the possibilities are vast:
- Savory Variations: Experiment with garlic powder, onion powder, smoked paprika, black pepper, or a dash of Worcestershire sauce.
- Spicy Kicks: A pinch of cayenne pepper, chili powder, or a blend of your favorite hot spices can add a welcome heat.
- Sweet Treats: For a dessert-like snack, combine cinnamon, sugar (brown or white), and a touch of nutmeg.
The Roasting Process – Achieving Crispy Perfection
Preheat your oven to 300-325°F (150-160°C). Lower temperatures allow the seeds to dry out and crisp up without burning. Spread the seasoned seeds in a single layer on a baking sheet. Overcrowding will lead to steaming, so use multiple sheets if necessary. Roast for 20-30 minutes, stirring halfway through to ensure even browning. Keep a close watch in the final minutes, as seeds can go from perfectly golden to burnt very quickly. The seeds are done when they are fragrant, golden brown, and audibly crisp when cooled.
Tips for an Optimal Batch
- Don't Rush the Drying: Patience here truly pays off in texture.
- Single Layer is Key: Essential for roasting, not steaming.
- Listen for the Crunch: A good indicator they are done, especially once cooled.
- Cool Completely: Seeds will continue to crisp as they cool. Store in an airtight container once fully cooled.
Summary
Roasting pumpkin seeds is a quintessential autumn tradition that, despite its apparent simplicity, benefits from careful attention to detail. By meticulously cleaning and drying the seeds, judiciously seasoning them, and roasting them at a moderate temperature in a single layer, anyone can consistently produce a batch of perfectly crisp, flavorful snacks. This time-honored practice not only utilizes a delicious byproduct of pumpkin carving but also creates a wholesome, customizable treat that captures the essence of the season.
Resources
Details
Author




Latest articles



 }})
You can now watch HBO Max for $10
The ritual of carving pumpkins for autumn festivities often yields a hidden culinary treasure: their seeds. For many, including this author, the tradition of transforming these humble seeds into a crispy, savory snack stretches back to childhood, a simple act passed down through generations. While the process is remarkably straightforward, its very simplicity has often led to the notion that it's "not really a recipe"—a sentiment I've long shared. Yet, the persistent requests for "my" method underscore a universal desire for guidance, even on the most uncomplicated of culinary endeavors. This article aims to demystify the art of roasting pumpkin seeds, offering a clear, authoritative guide to achieving consistently delicious results.
The Uncomplicated Art of Roasting Pumpkin Seeds
At its core, roasting pumpkin seeds is about transforming a fibrous, moist seed into a crunchy, flavorful bite. The magic lies in a few critical steps that, when executed correctly, elevate a byproduct into a star snack. It’s less about intricate techniques and more about precise preparation and attentive execution.
Essential Preparation: From Gourd to Good
Step 1: Cleaning and Separation
Upon extracting the seeds from the pumpkin, they will be encased in stringy pulp. The most effective method for separation involves placing the seeds and pulp in a large bowl of water. The seeds tend to sink, or at least separate more easily, while the pulp can be gently pulled away. Rinse the seeds thoroughly under cold running water, removing all remaining pumpkin flesh and fibers. This step is crucial for achieving clean, evenly roasted seeds.
Step 2: The Critical Dry
Perhaps the most overlooked, yet vital, step is drying the seeds. Excess moisture will steam the seeds rather than roast them, resulting in a chewy, rather than crispy, texture. After rinsing, spread the seeds in a single layer on a clean kitchen towel or paper towels. Pat them thoroughly dry. For optimal crispness, some culinary experts recommend allowing them to air dry for several hours, or even overnight, after initial towel drying. This ensures minimal surface moisture.
Seasoning – The Flavor Canvas
Once clean and dry, the seeds are ready for seasoning. The classic approach is elegantly simple: a touch of fat and a sprinkle of salt. Olive oil or melted butter are excellent choices, providing a medium for even heat distribution and adherence for seasonings. Approximately one tablespoon of oil per cup of seeds is a good starting point. Toss the seeds with the chosen fat until lightly coated. Then, season generously with sea salt or kosher salt. Beyond this foundational approach, the possibilities are vast:
- Savory Variations: Experiment with garlic powder, onion powder, smoked paprika, black pepper, or a dash of Worcestershire sauce.
- Spicy Kicks: A pinch of cayenne pepper, chili powder, or a blend of your favorite hot spices can add a welcome heat.
- Sweet Treats: For a dessert-like snack, combine cinnamon, sugar (brown or white), and a touch of nutmeg.
The Roasting Process – Achieving Crispy Perfection
Preheat your oven to 300-325°F (150-160°C). Lower temperatures allow the seeds to dry out and crisp up without burning. Spread the seasoned seeds in a single layer on a baking sheet. Overcrowding will lead to steaming, so use multiple sheets if necessary. Roast for 20-30 minutes, stirring halfway through to ensure even browning. Keep a close watch in the final minutes, as seeds can go from perfectly golden to burnt very quickly. The seeds are done when they are fragrant, golden brown, and audibly crisp when cooled.
Tips for an Optimal Batch
- Don't Rush the Drying: Patience here truly pays off in texture.
- Single Layer is Key: Essential for roasting, not steaming.
- Listen for the Crunch: A good indicator they are done, especially once cooled.
- Cool Completely: Seeds will continue to crisp as they cool. Store in an airtight container once fully cooled.
Summary
Roasting pumpkin seeds is a quintessential autumn tradition that, despite its apparent simplicity, benefits from careful attention to detail. By meticulously cleaning and drying the seeds, judiciously seasoning them, and roasting them at a moderate temperature in a single layer, anyone can consistently produce a batch of perfectly crisp, flavorful snacks. This time-honored practice not only utilizes a delicious byproduct of pumpkin carving but also creates a wholesome, customizable treat that captures the essence of the season.
Resources
Latest articles
You can now watch HBO Max for $10
Similar posts

This is a page that only logged-in people can visit. Don't you feel special? Try clicking on a button below to do some things you can't do when you're logged out.
Example modal
At your leisure, please peruse this excerpt from a whale of a tale.
Chapter 1: Loomings.
Call me Ishmael. Some years ago—never mind how long precisely—having little or no money in my purse, and nothing particular to interest me on shore, I thought I would sail about a little and see the watery part of the world. It is a way I have of driving off the spleen and regulating the circulation. Whenever I find myself growing grim about the mouth; whenever it is a damp, drizzly November in my soul; whenever I find myself involuntarily pausing before coffin warehouses, and bringing up the rear of every funeral I meet; and especially whenever my hypos get such an upper hand of me, that it requires a strong moral principle to prevent me from deliberately stepping into the street, and methodically knocking people's hats off—then, I account it high time to get to sea as soon as I can. This is my substitute for pistol and ball. With a philosophical flourish Cato throws himself upon his sword; I quietly take to the ship. There is nothing surprising in this. If they but knew it, almost all men in their degree, some time or other, cherish very nearly the same feelings towards the ocean with me.
Comment